Quick Start
Setup your services
First, you'll want to navigate to your services tab in your settings area. From here you can add / remove services that should appear on your online scheduling tool.
Add a diagnostic job This is the only service you cannot fully customize, our team has designed a flow of questions intended to help your shop collect information about the customers needs. If you would prefer not to siplay this option at all, you may remove it from all service groups and it will not be included in your booking tool. While the flow is not customizable, you can change the name and/or the description to fit how you would prefer to display it to your customers. We highly recommend general names and descriptions for this service, here are a few examples...


Add bookable services
This is a great place to add 6-8 of your most popular services. You'll want to pick clear icons and easily recognizable names. Use descriptions that add additional value to the service, i.e complimentary inspections.
You can enable waiters for these services and use service limits in the booking tool settings to set service specific rules around daily appointments.
Adding time is an essential part to building a service. This will not be shown to customers, instead it'll be used to block space in your calendar which helps the scheduler understand how much availability you have.
Linking Canned Jobs will increase availability accuracy. By linking your most commonly used services from your shop's Repair Orders, we will be able to associate existing appoitnments on your shop management calendar, with these services in Shopgenie. This means when you set service specific limits, we can take those exisitng appointments into account. (For this functionality to work, you most have a repair order with a service added attached to your existing appointments).

Getting started with availability
First, head over to Settings -> Booking Tool to get started.
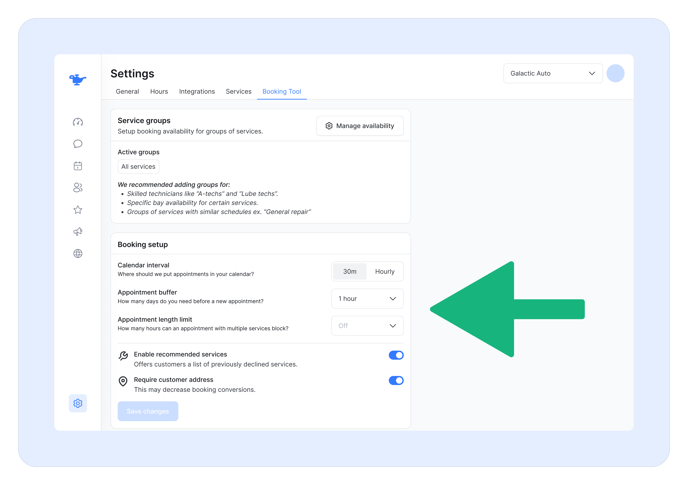
Service groups
The online scheduling tool allows you to fully customize your online booking availability by technician skill level, available bays or even specific services. Dispatching work is both an art and a science, service groups help you put appointments in the right time slot but leaves the art of finding the right tech for the job in your hands.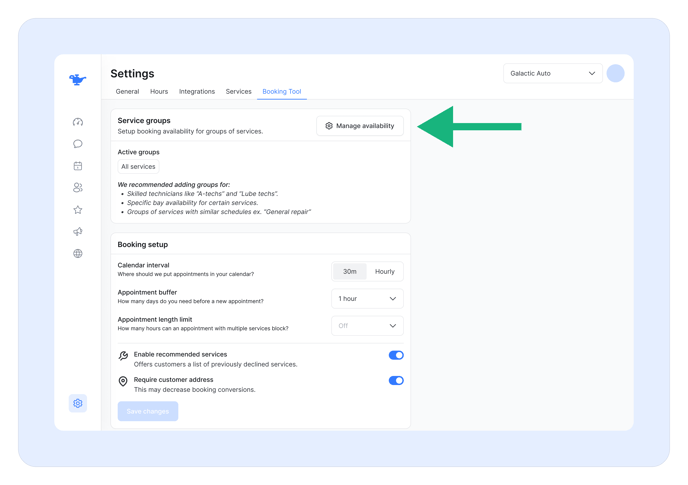
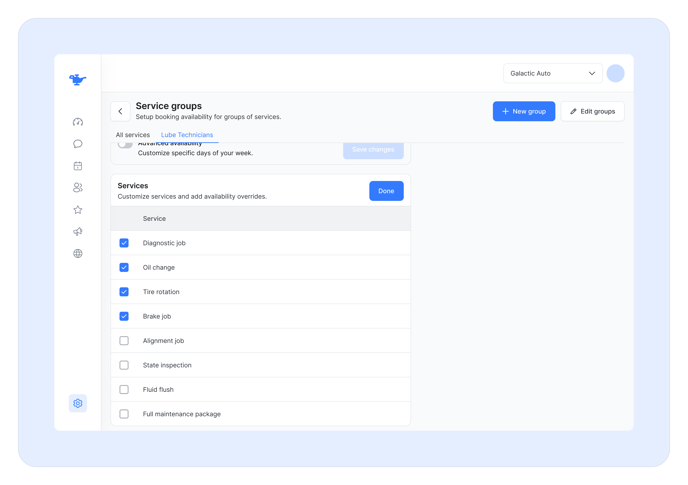
How to group your services
By default all your services will appear in one group. This allows you manage availability across all types of repair very easily. We recommend staying with one service group if your technicians work on all services equally, instead of based on skill level.
Adding multiple groups leads to more accurate availability. You may have already run into the issue of not being able to take a service at a specific time because a technician isn't in the shop that day. By grouping services that require similar resources you can customize the availability any way you'd like. Here are common ways to group services.
- Technician skill level like “A-techs” and “C-techs”.
-
- Do groups of your technicians only handle specific services?
- Specific technicians like "John", "James" and "Ron".
- Do you only have a few technicians that handle specific services?
- Specific bay availability for services with specific resources, like an alignment rack.
- Do you have specific bays that can only handle certain services?
- Type of repair services with similar schedules ex. “General repair” or "Lube and tires"
- Do you manage availability by repair category in general?

Customizing a group
- Step 1: Create a new group and complete the initial setup.
- Step 2: Scroll through your new group and customize your availability where needed.
- Step 3: Go to your online booking tool and check on your availability.
Renaming or deleting a group
Just click the edit groups button in your service groups area. This will allow you to rename or delete specific groups.

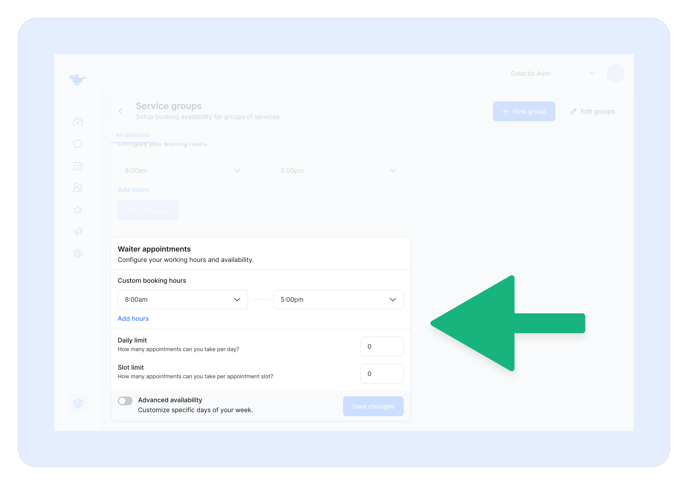
General availability
This setting is at the core of your booking tool and is critical to spend time thinking about. We believe you should always have control over your calendar while empowering customer with a quick and efficient booking experience.
As a general principle, it's better to pick limits below your capacity and raise them later. For example, if you only have one alignment rack then setting your limit daily limit to 1 can protect your schedule
- The Daily limit allows you to set maximum number of appointments per day.
- The Slot limit allows you to set a limit on how many appointments can be booked per calendar slot.

Our recommendations
- Ask yourself how many appointments you can take per day?
- Start small at first, it's better to be in control than overbooked.
- Tune this number as you get comfortable. Start at 80% of what your maximum is and work up to it.
Advanced availability
You might find yourself needing to tune your availability by day. You can easily switch on more advanced controls over this if needed.
Initially, your availability will look simplified. You'll have access to daily limits and slot limits which apply generally across your week. To activate advanced availability, turn the switch on the bottom.

Now that you've enabled advanced availability, you'll notice your limits split out on a daily basis. You can individually customize limits per weekday. If this is not useful, then simply turn off the toggle which will reset your limits.
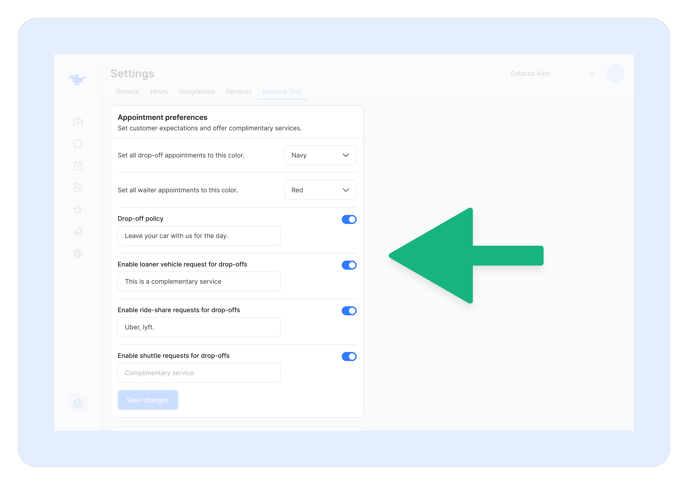
Set rules around waiter appointments
Appointment preferences